들어가며
서버 쪽 개발을 진행하다 보면, 다른 서버에 요청을 해야하는 경우가 있습니다. 예를 들어, 우리 서버 플랫폼에서 다른 플랫폼에 API를 Call하여 그 정보를 보여줘야 한다거나, 날씨, 주식 등의 Open API 를 사용하려고 하는 경우에도 RestTemplate를 사용합니다.
이러한 부분을 가장 손쉽게 사용하는 방법은 RestTemplate를 사용하는 것입니다. 여기서는 RestTemplate를 생성하고 이를 이용해서 Call을 보낸 뒤, 그 결과를 Logging 해 보겠습니다.
구현하기
Dependency 추가
웹 모듈이 필요하므로 아래와 같이 dependency를 추가합니다.
1
2
3
4
5
6
        <!-- APACHE HTTP CLIENT -->
        <dependency>
            <groupId>org.apache.httpcomponents</groupId>
            <artifactId>httpclient</artifactId>
        </dependency>
        <!-- APACHE HTTP CLIENT -->
서버 개발을 하고 있지만, 다른 서버에 요청을 하고 그 결과를 받기 위해서는 우리가 Client 입장이 되므로, Client 관련 dependency 를 추가합니다.
설정 값 추가
다 하고 설정으로 빼내어도 되지만, 지난 포스트에서 언급했던 것 처럼, Property 값을 가져와서 이를 직접 활용해 보도록 하겠습니다. application.yml 파일을 열고 아래 내용을 추가합니다.
1
2
3
4
5
6
7
restTemplate:
  factory:
    readTimeout: 5000
    connectTimeout: 3000
  httpClient:
    maxConnTotal: 100
    maxConnPerRoute: 5
RestfulConfig 파일의 생성
아래처럼 RestfulConfig.java 파일을 아래에 추가합니다. 여기에서 restTemplate bean 을 생성해 주게 됩니다. 사용하고자 하는 곳에서는 @autowired annotation 넣고 사용하면 될 것입니다.
1
2
3
4
5
6
7
8
9
10
11
12
13
14
15
16
17
18
19
20
21
22
23
24
25
26
27
28
29
30
31
32
33
34
35
36
37
38
39
40
41
42
43
package com.simplify.sample.restful;

import org.apache.http.client.HttpClient;
import org.apache.http.impl.client.HttpClientBuilder;
import org.springframework.beans.factory.annotation.Value;
import org.springframework.context.annotation.Bean;
import org.springframework.context.annotation.Configuration;
import org.springframework.http.client.HttpComponentsClientHttpRequestFactory;
import org.springframework.web.client.RestTemplate;

@Configuration
public class RestfulConfig {

    @Value("${restTemplate.factory.readTimeout}")
    private int READ_TIMEOUT;

    @Value("${restTemplate.factory.connectTimeout}")
    private int CONNECT_TIMEOUT;

    @Value("${restTemplate.httpClient.maxConnTotal}")
    private int MAX_CONN_TOTAL;

    @Value("${restTemplate.httpClient.maxConnPerRoute}")
    private int MAX_CONN_PER_ROUTE;

    @Bean
    public RestTemplate restTemplate() {

        HttpComponentsClientHttpRequestFactory factory = new HttpComponentsClientHttpRequestFactory();
        factory.setReadTimeout(READ_TIMEOUT);
        factory.setConnectTimeout(CONNECT_TIMEOUT);

        HttpClient httpClient = HttpClientBuilder.create()
                .setMaxConnTotal(MAX_CONN_TOTAL)
                .setMaxConnPerRoute(MAX_CONN_PER_ROUTE)
                .build();

        factory.setHttpClient(httpClient);
        RestTemplate restTemplate = new RestTemplate(factory);

        return restTemplate;
    }
}
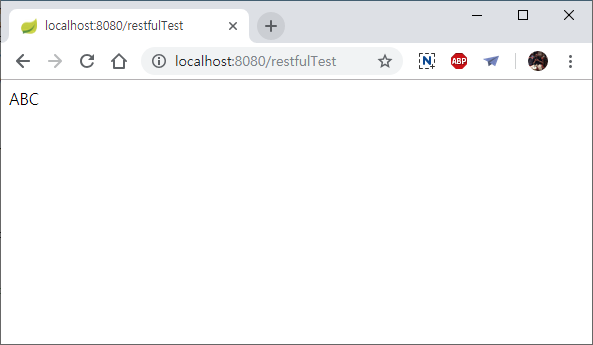
Controller 생성
restful call을 하는 아래 Controller 를 생성하고, http://localhost:8080/restfulTest 를 브라우저에 입력합니다. 로그인창이 최초 1회 나타나고 나면 정상적으로 call 한 결과를 화면에 보여줄 것입니다.
1
2
3
4
5
6
7
8
9
10
11
12
13
14
15
16
17
18
19
20
21
22
23
24
25
26
27
28
29
30
31
32
33
34
package com.simplify.sample.restful;

import org.slf4j.Logger;
import org.slf4j.LoggerFactory;
import org.springframework.beans.factory.annotation.Autowired;
import org.springframework.security.core.annotation.AuthenticationPrincipal;
import org.springframework.web.bind.annotation.RequestMapping;
import org.springframework.web.bind.annotation.RestController;
import org.springframework.web.client.RestTemplate;

import com.simplify.sample.security.domain.SecurityMember;

@RestController
public class RestfulController {

    private Logger LOGGER = LoggerFactory.getLogger(RestfulController.class);

    @Autowired
    RestTemplate restTemplate;

    @RequestMapping("/restfulTest")
    public String home(@AuthenticationPrincipal SecurityMember securityMember) {

        LOGGER.debug(securityMember.getIp());

        String obj = restTemplate.getForObject("http://localhost:8080/openapi/readUser/abc", String.class);

        LOGGER.debug(obj);

        return obj;
    }


}
결과 확인
GitHub 소스 위치 : https://github.com/Simplify-study/SpringBootSample.git
출처: https://4urdev.tistory.com/43 [Simplify]
-
Previous
SpringBoot - (9) Property, Authentication Principal -
Next
How to change port for Remote Desktop